Ever wondered how to make Roblox items that truly stand out and capture attention? This guide is your ultimate resource, breaking down the entire process from initial concept to uploading your creations. Roblox has become a massive platform for user-generated content, offering an incredible opportunity for gamers like us who enjoy both playing and creating. Whether you dream of designing custom clothing, unique accessories, or even interactive objects for your own experiences, understanding the steps involved can unlock a whole new level of engagement. Many busy gamers find themselves with limited free time, but the joy of crafting something original for the vibrant Roblox community is immensely rewarding. We'll cover everything from the essential tools you need to the crucial design principles and how to navigate the Roblox Studio environment. Learn how to transform your creative ideas into digital reality, connect with fellow creators, and perhaps even earn some Robux along the way. Get ready to dive into the exciting world of Roblox item creation and leave your unique mark on the metaverse. Discover trending tips and tricks to optimize your creations for maximum appeal and ensure they meet the platform's guidelines. This informational hub provides all the navigational insights you need to begin your journey as a successful Roblox item creator today.
Related games- Guide to Level Below Roblox Codes Maximize Your Play
- Guide How To Trade On Roblox Safely And Effectively
- Guide How to Maximize Your Sony PS5 GTA 6 Gaming
- Mining Sim 2 Roblox: Is There a Bottom Depth?
- Guide GTA 6 Google Map Your Vice City Journey
What are the initial steps to make a Roblox item for beginners?
For beginners looking to make a Roblox item, the initial steps involve setting up Roblox Studio, which is free to download. Then, you'll need a basic 2D image editor like GIMP or Paint.NET for clothing textures, or Blender for 3D modeling if you're aiming for accessories. Start with simpler projects like T-shirts or basic shirts to get a feel for the workflow before tackling more complex 3D assets. The Roblox Developer Hub offers templates and guides to kickstart your journey, providing a solid foundation for your first creations.
How much Robux does it cost to upload a custom item on Roblox?
Currently, uploading a custom clothing item like a shirt or pants on Roblox costs 10 Robux per item. This fee is a standard charge to cover the platform's moderation and processing costs for user-generated content. For 3D accessories, the cost may vary or be part of the UGC program guidelines. It's a small investment to bring your creative vision to life and share it with the millions of players on the platform.
What's the difference between creating clothing and 3D accessories in Roblox?
The main difference lies in the tools and complexity. Creating clothing (shirts, pants, T-shirts) primarily involves designing 2D textures using templates and an image editor, then uploading them. This is a great entry point. 3D accessories, like hats or hair, require 3D modeling software like Blender to create the actual three-dimensional shape, followed by UV unwrapping and texturing. They are generally more complex, often requiring rigging, and are usually part of the Roblox UGC program for official release.
Can I make money by creating and selling items on Roblox?
Yes, absolutely! Many creators earn Robux by designing and selling items on Roblox. Once your clothing items (shirts, pants) are uploaded and approved, you can set a price. For 3D accessories, if you're accepted into the Roblox UGC program, you can also sell those. Roblox takes a commission, but the remaining Robux are yours. Popular, high-quality items that align with current trends can generate significant earnings, allowing dedicated creators to monetize their passion and skill.
What are the best practices for designing appealing Roblox items?
To design appealing Roblox items, focus on originality, quality, and understanding your audience. Research current fashion trends within the Roblox community and beyond. Use a consistent aesthetic and pay attention to detail in your textures and models. Optimize for performance by keeping polygon counts reasonable for 3D items. Seek feedback from fellow creators in forums or Discord groups to refine your designs. Most importantly, create items that you genuinely find exciting and unique, as your passion will shine through and resonate with players.
What are common mistakes to avoid when making Roblox items?
Common mistakes include copyright infringement (using branded logos or characters without permission), poor texture resolution leading to blurry designs, ignoring Roblox's content guidelines (resulting in moderation), and creating items with excessively high polygon counts that cause lag. Another pitfall is not testing items thoroughly in-game, which can lead to unexpected visual bugs or improper scaling. Always double-check guidelines, test extensively, and prioritize originality and appropriate content to ensure a smooth creation process.
How do I get my 3D accessories approved for the Roblox UGC program?
Getting 3D accessories approved for the Roblox UGC program involves several steps and meeting specific criteria. First, you need to apply to become a UGC creator, which often requires a portfolio showcasing your 3D modeling and texturing skills. Once accepted, you must adhere to strict technical specifications regarding mesh complexity, texture size, rigging, and content guidelines. Your submissions go through a moderation process to ensure quality and compliance. Consistent high-quality work and a good understanding of Roblox's asset requirements significantly increase your chances of approval and success within the program.
Hey there, fellow gamers! Ever find yourself scrolling through the Roblox catalog, seeing all those cool outfits, unique accessories, and thought, 'Man, I wish I could make something like that'? You're not alone. Many of us, especially those balancing gaming with jobs, family, and life's other adventures, love the idea of expressing our creativity within the games we enjoy. Roblox, a platform where 87% of US gamers regularly spend time, is more than just a place to play; it's a bustling hub for creators. For many, gaming isn't just about escape; it's about skill-building, social connection, and even a bit of digital entrepreneurship. But jumping into item creation can feel like a whole new game with confusing rules. Where do you even start?
The good news is, making your own Roblox items is totally achievable, even if you only have a few hours a week to dedicate. It's a fantastic way to unwind, learn new skills, and connect with a massive community. This guide is designed for you—the busy adult gamer who wants practical solutions, not hype. We'll walk you through everything you need to know about how to make Roblox items, from concept to completion, helping you avoid common setup headaches and optimize your creative process. Think of it as a friend's guide to unlocking your inner Roblox designer, turning your imaginative sparks into tangible, in-game creations that your friends and the wider community will love. Let's dive in and transform your ideas into pixelated reality, making the most of your valuable gaming time!
What Are Roblox Items and Why Should I Create Them?
Roblox items are essentially any piece of virtual content that can be used or worn within the Roblox platform. This includes a vast array of assets like clothing (shirts, pants, T-shirts), accessories (hats, hair, bags, shoulder pets), gear, and even 3D models for in-game environments or tools. The beauty of Roblox is its user-generated content (UGC) ecosystem, which means millions of these items are designed by players just like you.
Why create them? Beyond the pure fun and creative expression, there are several compelling reasons. Firstly, it's a fantastic way to personalize your own avatar or game experiences. Secondly, for many gamers who enjoy a challenge and skill-building, it offers a rewarding creative outlet. Plus, there's the potential to earn Robux—Roblox's virtual currency—by selling your items to other players. With mobile gaming dominating and social interactions being key for many US gamers, creating popular items can also boost your presence within the community and make you a recognized creator. It's a blend of artistic expression, technical learning, and a dash of entrepreneurial spirit, all within a fun gaming environment.
What Tools Do I Need to Start Making Roblox Items?
Getting started with Roblox item creation doesn't require a hefty investment in expensive software, which is great news for gamers on a budget. The primary tool you'll need is **Roblox Studio**, which is free to download and acts as your all-in-one development environment. It's where you'll assemble, test, and upload your creations. Think of it as your digital workshop.
For the actual design of textures (like patterns for shirts or details for accessories), you'll need a 2D image editing software. Free options like **GIMP** or **Paint.NET** are excellent starting points. If you're comfortable with paid software, **Adobe Photoshop** or **Procreate** (for iPad users) offer more advanced features. For 3D modeling, especially if you want to create custom accessories or complex objects, **Blender** is the industry standard and it's completely free. Learning Blender can seem daunting, but there are countless free tutorials online that break it down into manageable steps, making it a great skill to build over time.
How Do I Create Custom Clothing (Shirts, Pants, T-Shirts) in Roblox?
Creating custom clothing is one of the most popular entry points for new Roblox item designers. It primarily involves designing 2D textures that get wrapped around Roblox's default avatar body. Here's a simplified step-by-step guide:
- Download the Template: Start by downloading the official Roblox clothing templates (shirt and pants) from the Roblox Developer Hub. These templates are essential as they show you exactly where each part of the texture will appear on the avatar.
- Design Your Texture: Open the template in your 2D image editor (GIMP, Photoshop, etc.). This is where your creativity shines! Design your shirt, pants, or T-shirt by painting directly onto the template. Pay attention to colors, patterns, logos, and intricate details. Remember, the Roblox community loves unique and visually appealing designs.
- Save Your Design: Save your completed texture as a .PNG file. Ensure the dimensions match the template requirements (usually 585x559 pixels for shirts/pants).
- Upload to Roblox:
- Open Roblox Studio and navigate to the 'Create' tab on the Roblox website.
- Select 'Shirts,' 'Pants,' or 'T-Shirts' depending on what you've created.
- Upload your .PNG file.
- You'll need a small amount of Robux (currently 10 Robux) to upload each clothing item. This fee helps maintain the platform and prevent spam.
- Test and Refine: After uploading, put the item on your avatar in Roblox to see how it looks in-game. You might notice areas that need adjustment—perhaps a pattern doesn't align perfectly, or a color looks different. Go back to your image editor, make changes, and re-upload until you're satisfied.
For T-shirts, the process is even simpler as they are just images layered over an avatar's torso, requiring only an image upload without templates.
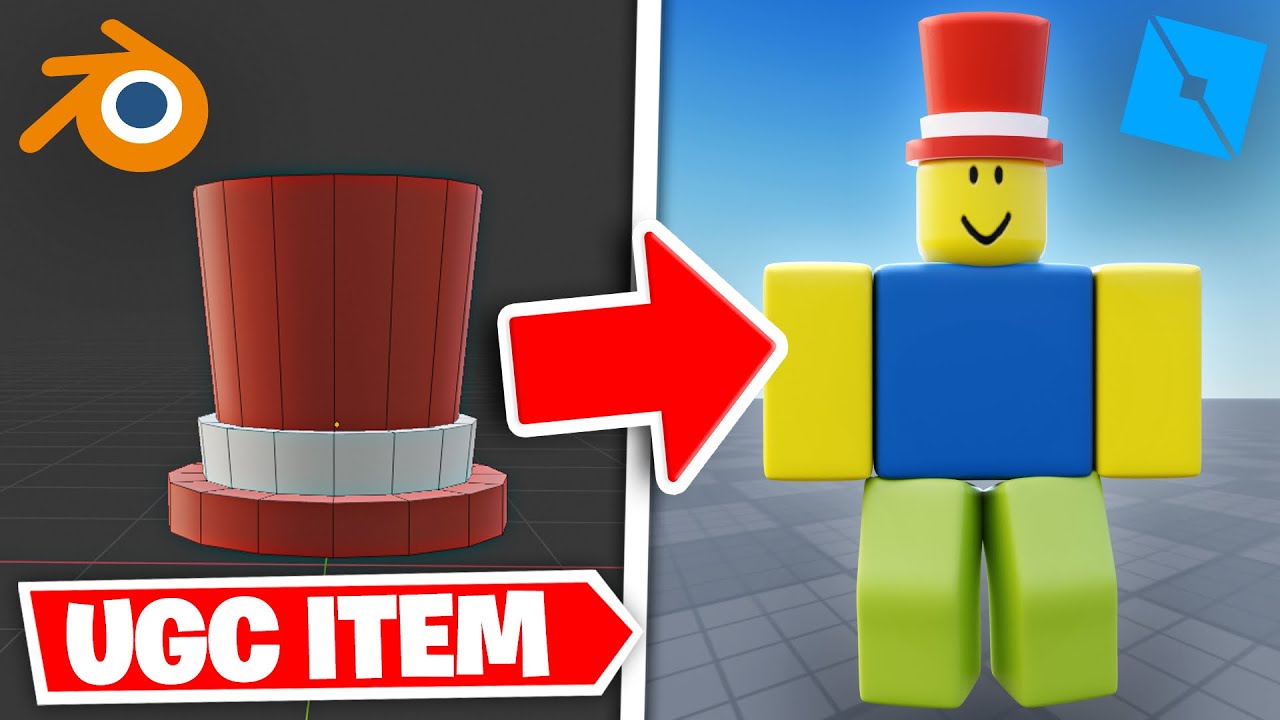
What's the Process for Making 3D Accessories or Models for Roblox?
Creating 3D accessories like hats, hair, or even custom props for your game is a bit more involved but incredibly rewarding. This typically requires a 3D modeling software like Blender. Here's the general workflow:
- Conceptualize and Sketch: Before opening any software, sketch your idea. What will it look like? How will it fit on an avatar? Having a clear vision saves time.
- Model in Blender:
- Use Blender to sculpt and model your accessory. Start with basic shapes and refine them.
- Keep the polygon count relatively low for optimal performance in Roblox, especially since many US gamers play on mobile devices.
- Ensure your model is appropriately scaled.
- UV Unwrapping: This step involves flattening your 3D model into a 2D surface, which allows you to paint textures onto it accurately.
- Texturing: Create detailed textures (colors, materials, patterns) for your model using your 2D image editor or Blender's texture painting tools.
- Rigging (for animated items): If your accessory needs to move or deform with the avatar (like certain types of hair or clothing), you'll need to rig it to a skeleton. This is an advanced step.
- Export to Roblox Studio: Export your model from Blender as an .FBX file, which is a common format Roblox Studio understands.
- Import into Roblox Studio: In Roblox Studio, use the 'Asset Manager' to import your .FBX file. You'll then place the model, attach it to the correct body part (if it's an accessory), and set its properties.
- Testing and Upload: Rigorously test your accessory in-game to check for clipping, scaling issues, or any visual bugs. Once satisfied, you can then submit it through the Roblox UGC program (which requires certain criteria and acceptance).
The Roblox Developer Hub has comprehensive guides and templates for UGC accessories, which are crucial for ensuring your items meet the platform's technical specifications.
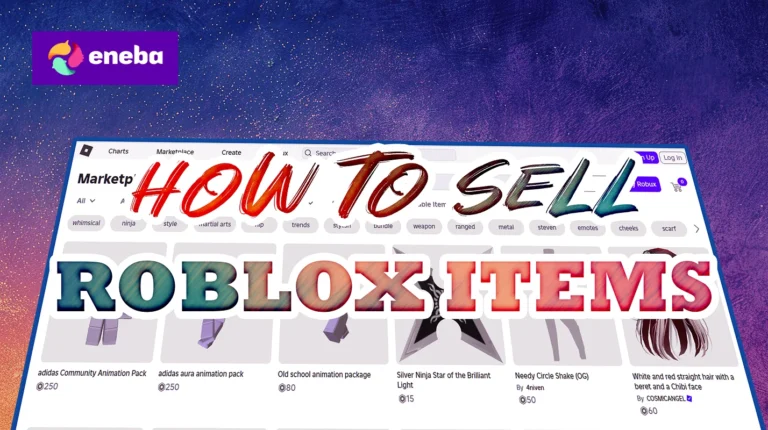
How Can I Monetize My Roblox Items and Earn Robux?
Making great items is fun, but earning Robux makes it even better, especially for gamers who want to get value for their time. Roblox offers several ways to monetize your creations:
- Selling Clothing: Once you upload shirts, pants, or T-shirts, you can set a price in Robux. When another player buys your item, you receive a percentage of the sale (Roblox takes a commission).
- Selling UGC Accessories: If you're accepted into the Roblox UGC program for accessories, you can upload and sell 3D hats, hair, and other wearables. This is a more exclusive program, but offers significant earning potential for popular designs.
- In-Game Purchases (Game Passes & Developer Products): If you're making items to be used within your own game experience, you can sell them as Game Passes (one-time purchases for specific perks/items) or Developer Products (consumable items like potions or in-game currency). This is a great way to monetize your entire game experience.
- Premium Payouts: If players with Roblox Premium accounts spend time in your experience, you can earn Robux through Premium Payouts, even if they don't buy your specific items. Popular items attract more players, which in turn boosts your overall payouts.
Success in monetization comes from creating high-quality, desirable items that resonate with the community. Staying current with trending styles and understanding what players are looking for is key.
What Are the Roblox Guidelines and Best Practices for Item Creation?
Roblox has strict guidelines to ensure a safe and positive environment for all players, especially given the platform's wide age range. Adhering to these is crucial to avoid your items being rejected or your account being moderated. Key guidelines include:
- No Copyright Infringement: Do not use copyrighted logos, characters, or designs from other brands or media unless you have explicit permission. This is a common pitfall.
- Appropriate Content: All items must be family-friendly. No sexually explicit, violent, discriminatory, or otherwise inappropriate content.
- Originality: Strive for unique designs. While inspiration is fine, direct copying or re-uploading other people's work is not allowed.
- Technical Specifications: For 3D items, adhere to polygon limits, texture sizes, and proper rigging conventions specified in the Roblox Creator Documentation. This ensures performance across all devices, from high-end PCs to mobile phones, where many US gamers spend their 10+ hours a week.
Best Practices:
- Quality Over Quantity: Focus on creating a few really polished items rather than many low-effort ones.
- Market Research: Look at what's currently popular on Roblox. What types of items are trending this month? What are players asking for? Social gaming trends heavily influence item popularity.
- Engage with the Community: Join creator forums, Discord servers, and groups. Get feedback on your designs before uploading.
- Iterate and Improve: Don't be afraid to experiment, learn from feedback, and continually refine your skills.
How Can I Promote My Roblox Items Effectively?
Creating an amazing item is only half the battle; getting it seen is the other. Promotion is vital, especially for new creators. Here are some effective strategies:
- Use Social Media: Share your creations on platforms like Twitter, Instagram, and TikTok. Use relevant hashtags like #RobloxDev, #RobloxUGC, #RobloxFashion. Visual content performs best, so showcase your items with cool avatars or in engaging scenarios.
- Roblox Groups and Forums: Participate in Roblox developer forums and relevant community groups. Share your work and get feedback.
- Collaborate with Other Creators: Partner with popular Roblox YouTubers, streamers, or even game developers. Having a known personality showcase your item can provide a massive boost in visibility. This taps into the strong creator/streamer influence prevalent among Gen Z/Millennial gamers.
- In-Game Promotion: If you have your own Roblox experience, feature your items prominently. Create engaging storefronts or integrate them into gameplay.
- Catalog Optimization: When naming and describing your items, use clear, descriptive keywords that players are likely to search for. For example, instead of
Learn to design Roblox items, master Roblox Studio, understand item creation guidelines, monetize your creations, discover design tips, troubleshoot common issues, leverage community resources.
35#1 Gallery how to make roblox item


How To Make A Game Pass In Roblox 2026 Step By Step Guide Game Pass Roblox.webp. How To MAKE Avatar Shop Items In Roblox UGC Community Creations YouTube . What Are The Biggest Items In Roblox Worlds For 2026 NoFilter. How To Create Own Items To Sell In Roblox . How To Make A Roblox UGC Item Beginner Tutorial YouTube
#2 Gallery how to make roblox item

How To Get Powerful Swords In Roblox For 2026 Sword League Roblox 1 . Roblox At GDC 2026 Where To Find Us All Week Roblox. Roblox Promo Codes 2026 Updated Free Bundles Pets Exclusive Items Roblox Promo Codes.webp. Does Roblox Have Ads For Players In 2026 1200x1769 . How To Sell Roblox Items For Real Money 2026 Guide How To Sell Roblox Items
#3 Gallery how to make roblox item


How To Make A Roblox RPG In 2026 KitsBlox Icon.PS 5RLL3 . How To Trade On Roblox 2026 Guide Image. Roblox Free Items Halloween 2026 Ultimate Guide Image Cdn. How To Make A Horror Game In Roblox Complete Guide 2026 Obby How To Make Horror Game Roblox Mid.webp. How Can You Redeem Roblox Codes Easily In 2026 Redeem Roblox Codes 1
#4 Gallery how to make roblox item


Roblox 2026 Logo REVEALED New Color New Look YouTube Maxres2 . Ready To Share How To Publish Your Roblox Game . How To Message On Roblox 2026 A Quick Guide . How To Message On Roblox 2026 A Quick Guide SL1500 . All Particle Effect Items On Roblox 2026 YouTube
#5 Gallery how to make roblox item


How To Make A Roblox SHIRT In 2026 YouTube . 2025 New Update Today How To Get Free Item MAKE In Roblox Edit Roblox . What Are Roblox Toy Codes And How Do They Work For 2026 . So We Actually Got Some Good News Roblox Egg Hunt 2026 YouTube . How To Publish A Roblox Game 2026 Complete Roblox Studio Tutorial
#6 Gallery how to make roblox item


How To Create A Roblox Account In 2026 What You Need Roblox Studio Home . How To Message On Roblox 2026 A Quick Guide . How To Create A Roblox Account In 2026 What You Need Roblox Login How To Create A New Account . How To Message On Roblox 2026 A Quick Guide . Roblox Me Command What Does It Actually Do NoFilter
#7 Gallery how to make roblox item
How To Make A Item In Roblox Studio YouTube . Roblox Rthro Codes Are They Real For 2026 Roblox Promo Codes . How To Make Money On Roblox 8 Proven Strategies Obby Do Roblox Game Creators Make Money Hero.webp. Free Roblox Items 2026 How To Get 50 Anime Faces Hairs UGC Now Free Roblox Items 2026 How To Get 50 Anime Faces Hairs UGC Now . How To Make A Roblox Game With AI Complete 2026 Guide Image